Humidifier Control with Arduino Uno! YouTube

Smart Humidifier Arduino Project Hub
Ultrasonic Humidifier intensity of mist control using Arduino - Sensors - Arduino Forum Ultrasonic Humidifier intensity of mist control using Arduino jkl256 March 22, 2021, 6:21am 1 Hi, I've got Ultrasonic Humidifier and I need to control/vary the intensity of the mist with Arduino. Any help on this is appreciated

How to Make Arduino Ultrasonic Humidifier YouTube
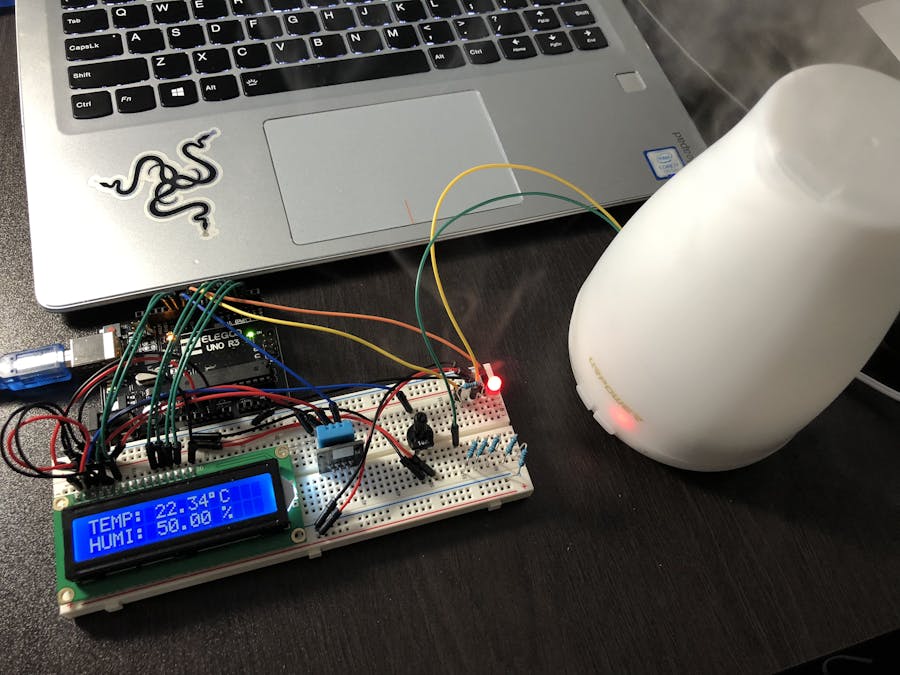
Today we will make an automatic air humidifier with Arduino! Beginner Full instructions provided 1 hour 22,162. Things used in this project . Hardware components: Arduino UNO:

Cheap Automatic Arduino DeHumidifier DIY 4 Steps Instructables
Step 3: Make Connections. Collect all the component mentioned earlier. Connect HSM-20G temperature and humidity sensor to the arduino board with the resistors and capacitor shown in the schematic. You can use breadboard to easily connect sensor to the resistors and capacitor and the arduino board.
Homemade humidifier ultrasonic Arduino and 3D printed
851 47K views 1 year ago How to Make Arduino Ultrasonic Humidifier Get a free trial of Altium Designer : 👉 http://www.altium.com/yt/ZAFERYILDIZ.more.more Join this channel and unlock.

DIY Automatic Air Humidifier [Arduino & XOD] YouTube
$22.99 Grove - Water Atomization Sensor: Ultrasonic atomization - + $10.90 PRODUCT DETAILS Description When the air in your home becomes too dry, it raises the risk of several respiratory issues. Professionals recommend that we keep the humidity in our home or workspace between 30 to 50 percent.

Easy Homemade Ultrasonic Humidifier for Less Than 10 3 Steps Instructables
A relay that was used to power humidifier and dehumidifier operations. The study was done after the testing procedure shows the result of different longer-term data when the dehumidifier and.

ArduinoBased Determination of an Air Humidifier Efficiency Arduino Project Hub
Arduino ultrasonic humidifiers consist of several components, including a water tank, diaphragm, fan, and control board. The control board is the brain of the humidifier, allowing you to adjust settings like humidity levels and fan speed.
DIY Ultrasonic Mist Maker using ESP01 and Ultrasonic Humidifier Module
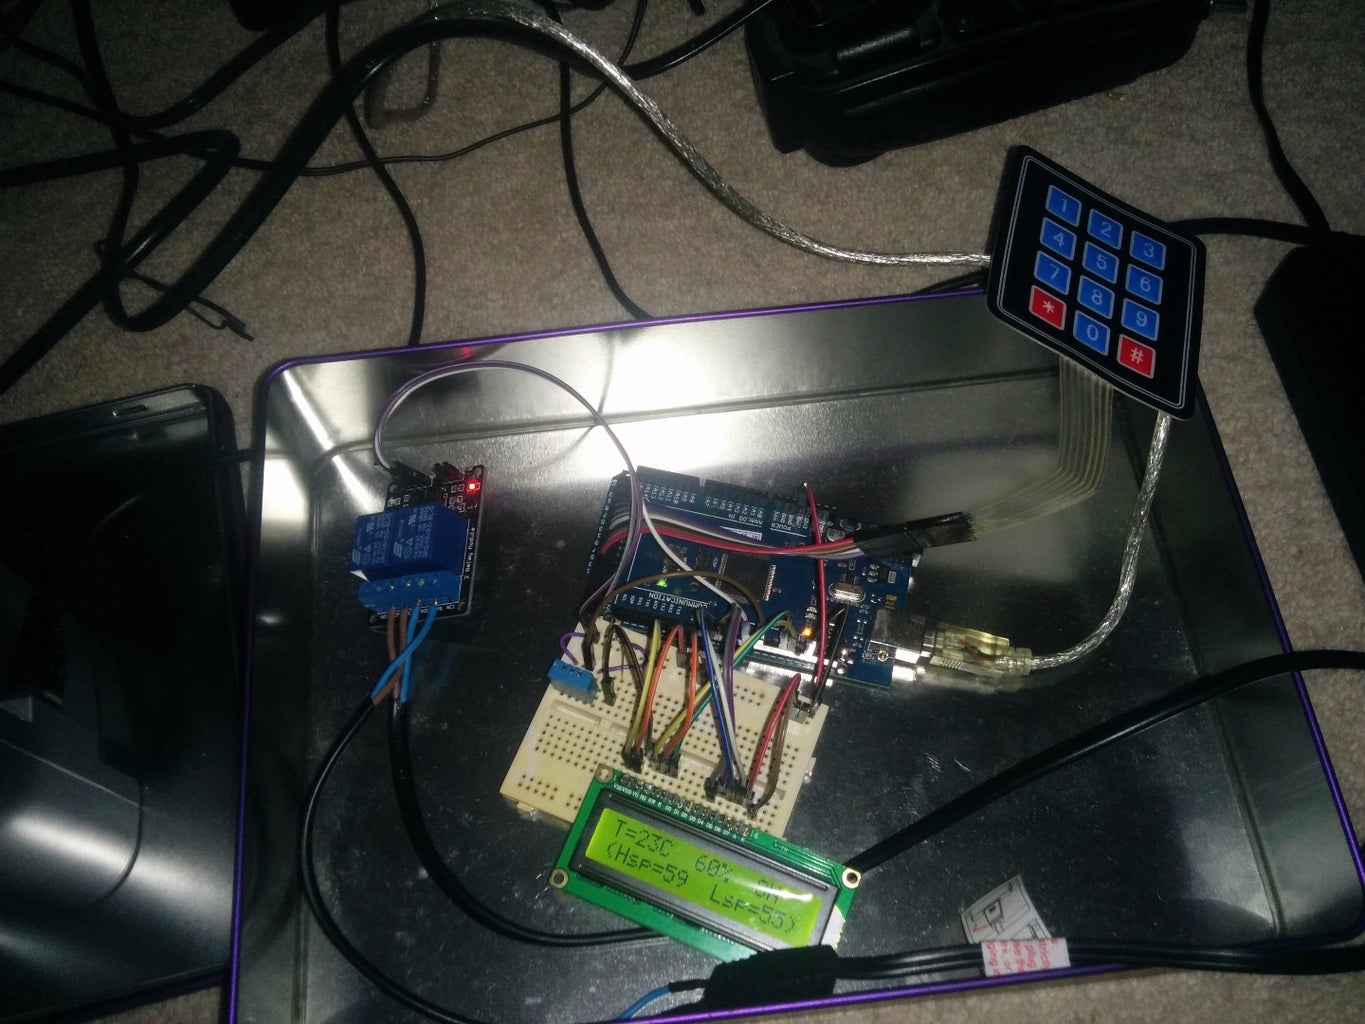
In this tutorial, we are going to build an automatic humidifier, which can maintain the relative humidity of the atmospheric air by using sensor mechanism. We are also using a display to show the.
Cheap Automatic Arduino DeHumidifier DIY 4 Steps Instructables
TOMORROW'S WEATHER FORECAST. 9/19. 83° / 63°. RealFeel® 86°. Sunshine and warmer.

Arduino схемы проектов
Step 1: What You Need • Arduino/Seeeduino • Grove - Temp&Humi Sensor • Grove - Button • I2C_LCD • Grove - Water Atomization Grove - Water Atomization is a perfect module for you to develop an atomizer or an atomizer module in your applications easily. With just a few simple steps, you can prototype an atomizer.
Automatic Humidifier Arduino Project Hub
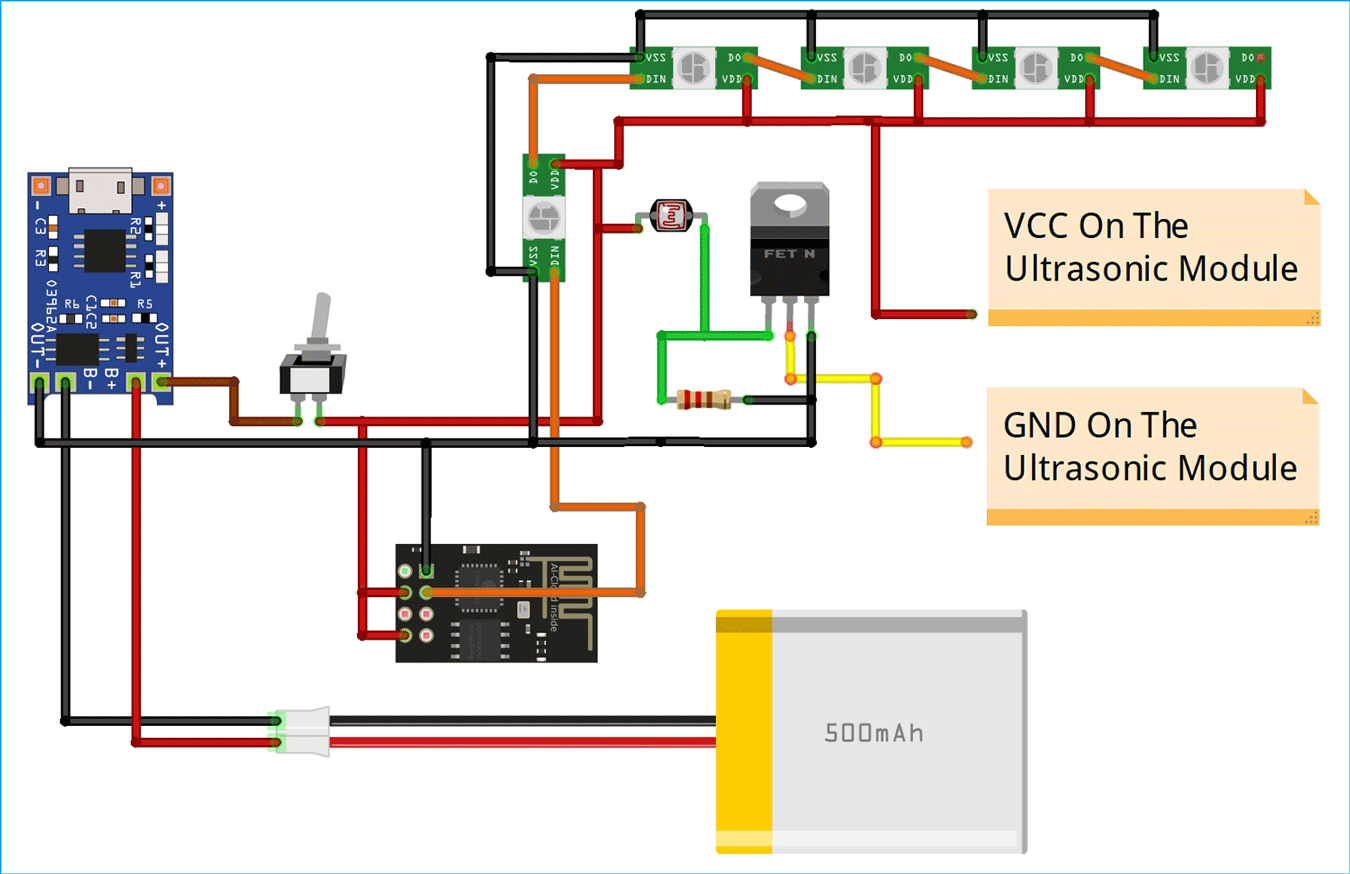
We have previously used this ultrasonic humidifier to build a portable humidifier using arduino that can control the humidity of the room based on present temperature and humidity. The main task of controlling the operation of the device lies with the ESP01 Module, which is also known commonly by the name ESP8266.
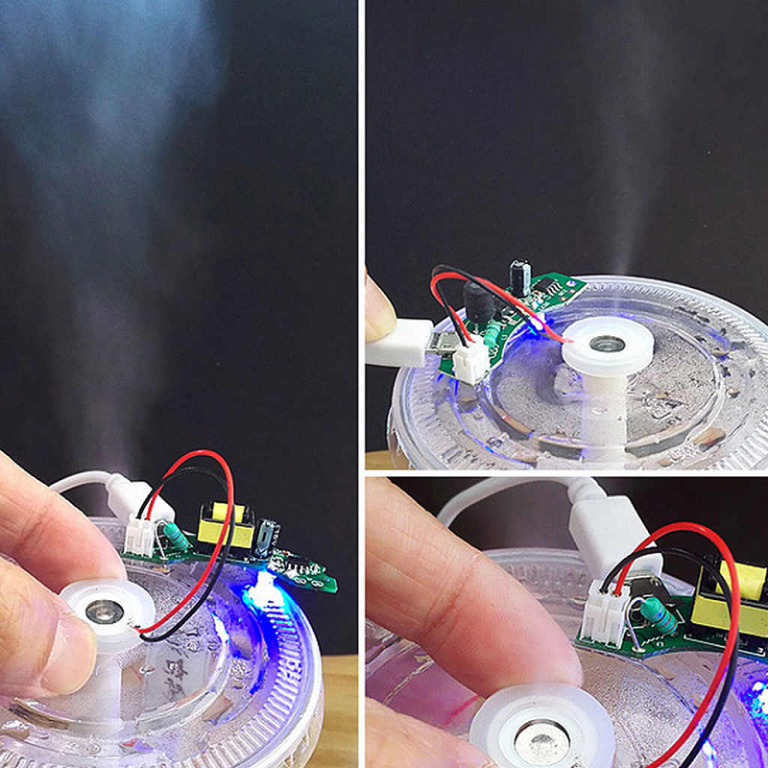
Buy USB Ultrasonic Humidifiers Power Circuit Board with Atomizing Chip
It involves attaching a dht11 temperature and humidity sensor to an Arduino, letting you modify your humidifier in a way that allows you to automatically turn the device on whenever the humidity in your home drops below a set level, for example 30%.

DIY Ultrasonic Mist Maker using ESP01 and Ultrasonic Humidifier Module
An Arduino humidifier is a device that uses an Arduino microcontroller to control the amount of moisture in the air. The Arduino is a small microcontroller board that can be programmed to perform various tasks. In this case, we will be using it to control a humidifier. The Arduino humidifier uses a humidity sensor to measure the humidity in the.
How to Program an Ultrasonic Humidifier
Step 3: Connect Everything to the Power Supply. Cut and strip the wires near the end of the ultrasonic device. Connect the ultrasonic module and the fan to the LED connector. You are now ready to fill the bottle and plug the power supply to enjoy your homemade humidifier! Check the video or see my post on Science Improved for a complete step-by.

My first Arduino Project Automatic Humidifier YouTube
humidifier arduino dht11 Components and supplies 1 DHT11 Temperature & Humidity Sensor (4 pins) 1 Standard LCD - 16x2 White on Blue 1 Arduino UNO 1 Humidifier 1 Resistor 1k ohm 1 Breadboard (generic) 1 Rotary potentiometer (generic) 1 Jumper wires (generic) 5 Resistor 10k ohm 1 Resistor 330 ohm 1 LED (generic) Tools and machines 1
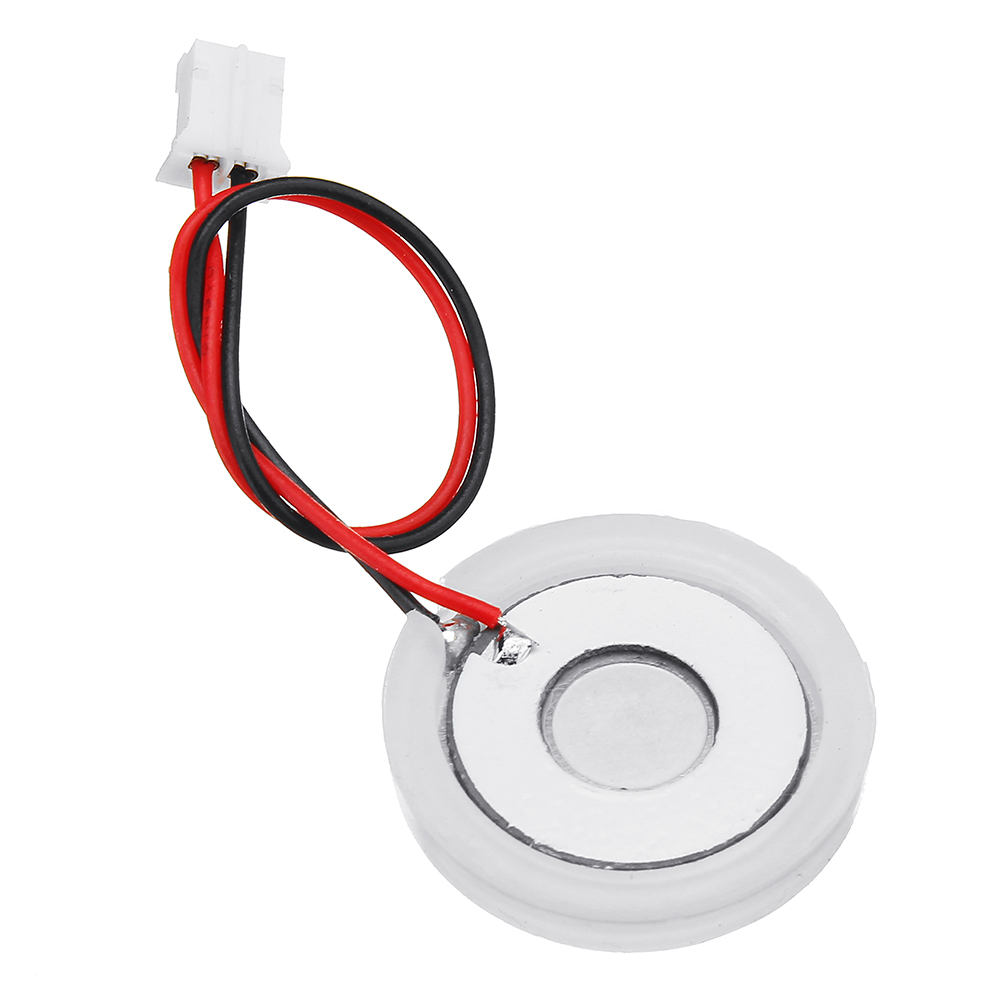
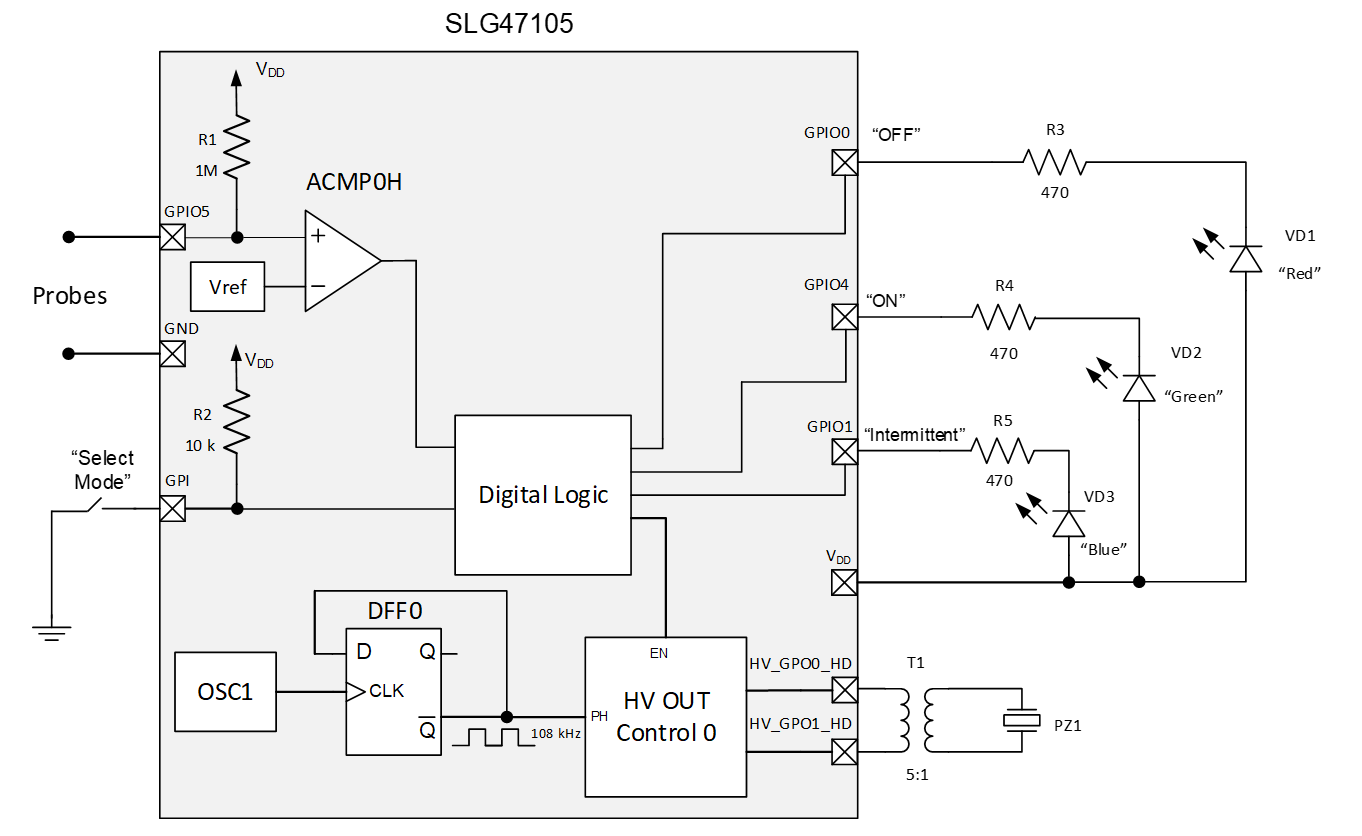
D20mm 113KHz Ultrasonic Humidifier with PCB board
SONIC ITALIA SRL | 1.172 pengikut di LinkedIn. Ultrasonic technology..We Know How!! | The ultrasonics technology provided by Sonic Italia is the guarantee of a reliable brand ever since it opened in 1987. Nowadays it is a market leader both in Italy and abroad, producing and selling thermoplastics welding and cutting solutions using ultrasonics. What makes Sonic Italia stand out is the.